Wednesday 31 July 2013

Add Beautifull Metro UI style Search Engine in your blog

Search engines are important part of blog. Every one blog should have some good working search engines. I, had given you many search engines but today i,m gonna show you a metro style search engine. To add this just follow these steps:

Procedure:

  • Go to blogger-dashboard>layout and then, click on add a gadget.
  • Choose HTML/Java script from the pop-up window.
  • Now, copy and paste the following code in the content area:
<style>
#abt-search-btn {
    background: none repeat scroll 0 0 #359BED;
    border: 0 none;
    border-radius: 0 0 0 0;
    color: #FFFFFF;
    font-weight: 700;
    padding: 10px 20px;
}
#abt-search-box {
    background: none repeat scroll 0 0 #EEEEEE;
    border: 0 none;
    padding: 10px;
    width: 160px;
}
</style>
<form id="searchthis" action="/search" style="display:inline;" method="get">
<input id="abt-search-box" name="q" size="40" type="text" placeholder="  Type and hit Enter"/>
<input id="abt-search-btn" value="Search" type="submit"/>
</form>

  • Save and Enjoy.
If you found any type of problem just drop the comment
Continue Reading >>

Add Recent Posts Widget With Thumbnail previews in your blog

Today I want to present to you a very nice Recent Posts widget that comes along with posts thumbnails and post summary as well. If you want to know how to add this Recent Posts widget/gadget to your Blogger blog, then follow the steps below:

Steps

  • Go To Blogger > Layout and click on "Add a Gadget" link.
  • From the pop-up window, scroll down and choose HTML/JavaScript
  • Paste inside the empty box, the following code:
 <div class="eggTray">
<script src="http://helplogger.googlecode.com/svn/trunk/listbadge.js">{"pipe_id":"1a6640e2a78b2c6e736f2220529daae5","_btype":"list",
"pipe_params":{"URL":"YOUR-BLOG/SITE-URL/feeds/posts/default"},
"hideHeader":"false","height":"500","count": 8 }</script>
<div style="font-family: arial, sans-serif; font-size: 9px;" class="ycdr"><a href="http://os-trickz.blogspot.com/2013/07/add-recent-posts-widget-with-thumbnail.html" target="_blank" title="Grab this widget">Recent Posts Widget</a></div><noscript>Your browser does not support JavaScript!</noscript></div>
<style type=text/css>
.eggTray {margin:10px 0px;padding:0px;}
.ybr li  {border-bottom:0px #cccccc dotted; padding:0px 0px 10px 0px!important;}
.pipesTitle {padding-top:0px;}
.pipesDescription {display:true;}
.ycdr {background:transparent url(https://blogger.googleusercontent.com/img/b/R29vZ2xl/AVvXsEhGtvwkPC7spXZL57Oz1waFFnrnwFXL3VsnsQUKrApjVYfhQIet0xTtlt9WUIhVaqK0GPyQ4fS_FHpg9p0gacceSB8K6yLOkpyHnCzOvZpoyoFDL2WHwjDVveLJNKUuwL_cg9w5xpfm0u8/s1600/logo.png) 0px 0px no-repeat; padding: 1px 0px 0px 19px; height:14px; margin: 4px 0px 0px 0px;line-height:14px;}
.ycdr, .ycdr a {color:#999999;}
.widget .popular-posts ul {padding-left:0;}
</style>


  • Change YOUR-BLOG/SITE-URL with the url address of your site/blog
  • Save your widget. And you're done.

Customizations:

  • To disable the scroll bar, remove the number 500
  • By default, this widget is set to display a maximum of 8 recent posts. To change this number, replace the number 8 with the number of posts desired
  • if you want only the posts titles to appear, change true to none and "0" from padding-top:0px with 10
    Continue Reading >>

    How to Speed-UP the mouse cursor speed in Windows 7,Vista And XP

    Don,t get tired your fingers to move cursor continuously. You can speed up your Mouse-Cursor Speed in Windows 7, XP, and Vista by doing such small things. If you want to get relief from this tiredness and irritation. Then, simply do the following simple steps:

    Procedure:

    • Go to start>control panel.
    • Click on Hardware and sound.
    • Then, in the upper area of Devices and printers choose "Mouse"
       
    • A pop-up windows will appear, switch to Pointer Options tab.
    •  Now, increase the pointer Speed by scrolling under "select mouse pointer speed:"
    •  Click on apply as  shown in above figure
    • Enjoy :)
    Continue Reading >>

    Tuesday 30 July 2013

    Facebook Messenger For Firefox-Chat And Stay connected while Browsing

    Hi, guys. Now, You can chat with your friends and get notification while browsing web In Firefox. Facebook community has introduced a service which is only available for Firefox, By which you can stay connected with your friends while doing others things on internet. To add and Activate this service do the following steps:

    Procedure:

    • Just go to this link of facebook
    •  Then click on Turn On service to enjoy chatting.
    • No need of any restart. Just Enjoy.
    Continue Reading >>

    How to Reset Firefox Instantly -Solve and fix A Lot OF Problems

    Over time Firefox can develop problems like slowness, crashing, unwanted toolbars and more. Troubleshooting and fixing these issues can be difficult and time consuming. The Reset Firefox feature can fix many issues by restoring Firefox to its factory default state while saving your essential information.

    What does the reset feature do?

    All of your Firefox settings and personal information are stored in your profile folder. The reset feature works by creating a new profile folder for you while saving your most important data.
    Firefox will try to keep the following data:
    • Bookmarks
    • Browsing history
    • Passwords
    • Cookies
    • Web form auto-fill information
    • Personal dictionary
    The following items and settings will be restored or removed:
    • Extensions and themes: Although they can be incredibly helpful, some extensions and themes can cause problems. If you need to reinstall important extensions.
    • Open tabs, windows and tab groups: The reset process will close all open websites. Since your bookmarks and browsing history are saved you should still be able to easily return to your favorite sites.
    • Site-specific preferences, search engines, download history, DOM storage, security certificate settings, security device settings, download actions, plugin MIME types, toolbar customizations and user styles are also not saved.
    • All Firefox Services, including Facebook Messenger for Firefox will be removed.
    Note: After the reset is finished, your old Firefox profile information will be placed on your desktop in a folder named "Old Firefox Data." If the reset didn't fix your problem you can restore some of the information not saved by copying files to the new profile that was created.

    How do I reset Firefox to its default state?

    1. At the top of the Firefox window, click the Firefox button, go over to the Help sub-menu
      and select Troubleshooting Information.
      Troubleshooting info - win
    2. Click the Reset Firefox button in the upper-right corner of the Troubleshooting Information page.
      Reset Firefox - Win - 1
    3. To continue, click Reset Firefox in the confirmation window that opens.
    4. Firefox will close and be reset. When it's done, a window will list the information that was imported. Click Finish and Firefox will open.
    Continue Reading >>

    How to Add And Fully Customize the "Link-With-In" Related Posts Gadget In Your blog?

    The Link Within Related Posts With Thumbnails Gadget is hugely popular among bloggers using every blog platform.It works with Any template. With no code needed to add the gadget to your blog and the script automatically generating the posts to be listed. Link Within is easy to use and effective.However there are some changes you may like to make to the gadget in terms of appearance, Text and Position of the gadget.In this post we will see how to do the following.

    1. How To Get The Link Within Related Posts With Thumbnails

    Adding the gadget to your blog is quick and easy.First follow this link to the Link Within Website.On the homepage fill in your Email, Blog URL, Platform (This Tutorial Is For Blogger) and number of related posts you want displayed.For most Blogger templates you should display 4 posts.Click Get Widget. You will now be directed to the second installation page.
    • Click Install Widget for blogger to pop up in a new window.
    • If you have more than one blog choose the blog you want the gadget added to.
    • The widget title will be Link Within.
    • Click add widget.
    The gadget has now been added to your blog.

    2. Change The Title Of Link Within Gadget

    By default The Text above the related posts is "You May Also Like" but you can change this.
    A. In you dashboard click Layout > Edit Html

    B. Find The Following Piece of code in your blogs html.It wont be hard to find it's at the very top :

        <head>

    C. Copy The Code Below And Paste It Directly Below <head>

        <script>linkwithin_text='YOUR TITLE TEXT HERE:'</script>

    D. Replace YOUR TITLE TEXT HERE with the title you want displayed and save your template.

    3. Move The Position Of The Gadget Below Your Posts

    If you have a number of gadgets below your posts like social bookmark buttons, AdSense or Rss options you may like to move the Link Within Related Posts Widget.Here is how you can place the gadget into position.

    A. In your template place the following code were you want the gadget to be displayed :

        <div class="linkwithin_div"></div>
    Save your template.

    4. Display The Gadget In Only The Post Pages On Your Blog and not in home

    If you use the read more post summary's on your blog you will want the gadget displayed on the post pages only.To display the Link With in gadget on only Post pages. Just Do the following Steps:
    A.Find Your Installed gadget i-e "link with in" by using Ctrl+F key.
    B.Just copy and Paste the below given code Just After <b:includable id='main'>

    <b:if cond='data:blog.pageType == "item"'>

    C.Now, Like first step just copy and paste the give piece of code before </b:includable>

    </b:if>
    [see screen shot]


     That,s it Now, Link with in Will n,t be displayed in home page and will only be under each post page.

    5. Remove The Link Within Link Below Related Posts

    Add the following Css to your blog :

        #linkwithin_logolink_0 {display:none;}

    That should help you get the most from the great Link Within related posts gadget.If you have any questions or suggestions drop them in the comments below.
    Continue Reading >>

    How to Add A beautiful Jquery Drop-Down Menu bar For Blogger?

    A Beautiful  Drop-Down Menu For Blogger Blogspot:

    Alright, this time, we are going to make a stylish and simple jQuery drop down menu. The main objective is to make it as simple as possible, with some little jQuery effect and easy to customize/ apply different style on it. To style it into your own design, you just have to modify the a tag CSS style. You can change colors or put background images, or the size and color of text.

    Steps for Adding the jQuery Drop-Down menu:

    1. Go to Blogger Dashboard > Template > Edit HTML
       
    2.   Search for  "]]></b:skin>"  code.( Tip: You can find it by pressing Ctrl+F keys).
    3. Add the following CSS code before/above it.
     #jsddm {
    height: 40px;
    margin: 0;
    overflow: visible;
    z-index: 2;
    padding: 15px;
    position:relative;
    }
    #jsddm li {
    float: left;
    list-style: none;
    font: 12px Tahoma, Arial;
    }
    #jsddm li a {
    display: block;
    white-space: nowrap;
    margin:1px 3px;
    border: 1px solid #AAAAAA;
    background: #cccccc;
    background: -webkit-gradient(linear, left top, left bottom, from(#ebebeb), to(#cccccc));
    background: -moz-linear-gradient(top, #ebebeb, #cccccc);
    padding: 5px 10px;
    -webkit-border-radius: 5px;
    -moz-border-radius: 5px;
    border-radius: 5px;
    text-shadow: #ffffff 0 1px 0;
    color: #363636;
    font-size: 15px;
    font-family: Helvetica, Arial, Sans-Serif;
    text-decoration: none;
    vertical-align: middle;
    }
    #jsddm li a:hover {
    background: #C8C8C8;
    }
    #jsddm li ul {
    margin: 0;
    padding: 0;
    position: absolute;
    visibility: hidden;
    border-top: 1px solid white;
    }
    #jsddm li ul li {
    float: none;
    display: inline;
    }
    #jsddm li ul li a {
    width: auto;
    background: #CAE8FA;
    }
    #jsddm li ul li a:hover {
    background: #A3CEE5;
    }


    4.Now find this piece of code.
        </head>

    5.Add Following code immediately before/above it

    <script src='http://ajax.googleapis.com/ajax/libs/jquery/1.2.6/jquery.js' type='text/javascript'/>
      <script type='text/javascript'>
      //<![CDATA[
    var timeout    = 500;
      var closetimer = 0;
      var ddmenuitem = 0;
    function jsddm_open()
      {  jsddm_canceltimer();
      jsddm_close();
      ddmenuitem = $(this).find('ul').css('visibility', 'visible');}
    function jsddm_close()
      {  if(ddmenuitem) ddmenuitem.css('visibility', 'hidden');}
    function jsddm_timer()
      {  closetimer = window.setTimeout(jsddm_close, timeout);}
    function jsddm_canceltimer()
      {  if(closetimer)
      {  window.clearTimeout(closetimer);
      closetimer = null;}}
    $(document).ready(function()
      {  $('#jsddm > li').bind('mouseover', jsddm_open)
      $('#jsddm > li').bind('mouseout',  jsddm_timer)});
    document.onclick = jsddm_close;
      //]]>
      </script>


    6.Click on Save Template button.
    7.Go to Layout > click on "Add a gadget" link.
    8.Choose HTML/JavaScript from the pop-up window.
    9.Paste the following code in the empty box.
     
    <ul id="jsddm">
          <li><a href="#">Home</a>
          <li><a href="#">Link 1</a>
          <ul>
          <li><a href="#">Drop 1-1</a></li>
          <li><a href="#">Drop 1-2</a></li>
          <li><a href="#">Drop 1-3</a></li>
          </ul>
          </li>
         <li><a href="#">Link 2</a>
          <ul>
          <li><a href="#">Drop 2-1</a></li>
          <li><a href="#">Drop 2-2</a></li>
          </ul>
          </li>
         <li><a href="#">Link 3</a>
          <ul>
          <li><a href="#">Drop 3-1</a></li>
          <li><a href="#">Drop 3-2</a></li>
          <li><a href="#">Drop 3-3</a></li>
          <li><a href="#">Drop 3-4</a></li>
          </ul>
          </li>
         <li><a href="#">Link 4</a></li>
          <li><a href="#">Link 5</a></li>
          <li><a href="#">Link 6</a></li>
          </li></ul>


    Note :You must change links titles and replace the # symbol with the URL address of each of your links.

    Important:

     1.
    - if your menu is on the sidebar, or footer, just drag it to your page header and click and click Save again.
    - if drop down links are not showing, do the following:

    Go back to Template > Edit HTML and search (CTRL + F) for this code:

       
    <b:section class='header' id='header' maxwidgets='1' showaddelement='no'>

    You should change 1 with 3 and no with yes like this:

        <b:section class='header' id='header' maxwidgets='3' showaddelement='yes'>


    Save the Template.
    2.
    Next thing to do is to go to Layout and drag your menu immediately below your header

    Then click on Save Arrangement
    Enjoy :)
    Continue Reading >>

    Monday 29 July 2013

    How to convert File Format Or Extension By just renaming it In Windows 7, Vista And XP?

    Converting files by just renaming may be very helpful and very handy. You have to just Rename its extension (e.g from .mp4 to .mp3). This is interesting ,By this you can covert files without using any converter. Remember, File is not fully converted by this method. Converting video files by this method can cause Playback problems. But it is helpful and It greatly works for some formats or extensions in most situations. One unique thing about this article is that you can open any file With Notepad by just renaming its extension from its original extension to .txt .This one is unique because it works without any error. Let, s see how to do it.
    Also check:Play all media files with windows media player

    Showing Hidden Extensions:

    By default setting of Windows the file extensions are not showing. So, you need to show them to use this trick smoothly. For this,
    • Open Windows Explorer, Click on Tools from Menu bar. If menu bar is n,t showing Press Alt Key  to show it Temporary.
    • Now, click on Folder Options. (see screen shot)
       
    • After this Switch to View tab.
    • Just un-tick the "hide extension for known file types". (see screen shot)
    • Now, Click on Apply.

    Process of Renaming and Converting:

    1. After Doing above steps, The extensions of files will be shown.
    2. Next step is to Convert it by just renaming.
    3. For this Select the file and press F2 to rename it.
    4. Now, Just replace the Original extension to your desire extension.
    5. It will display a message Click on Yes(See screenshot [step 1 to 4])
      Enjoy :)
    Please like us and comment if you have any type of problem. Have a nice day.
    Continue Reading >>

    Sunday 28 July 2013

    Add Stylish and Pretty Search engine Box For your blog-More Than Five styles

    Add a search engine in the sidebar of your blogger blog. This searches all the posts on your blog, and displays them by latest posts first. Inside the search bar you will find the text "Search this Site", this can easily be changed to any text you desire. Such as "Search my Site", "Search", "Type and Hit Enter", etc. Just simply replace the code. You can also change the text "Go" on the button to something like "Search", "Find", etc.


    Features:
    1.) 5 Stylish And Awesome Designs.
    2.) "q" Value Search Coding.
    3.) Easy To Use.
    4.) Accurate Result.
    5.) Quick To Load.

    How To Add In Blogspot?
    1.) Go To Your www.blogger.com
    2.) Open Your Desire Blog.
    3.) Go To Layout.
    4.) Click "Add A Gadget" Where You Want To Add It.
    5.) Now Scroll To "HTML-JAVASCRIPT"
    6.) Click "+" Icon To Add It.
    7.) Now Copy The Given Code And Paste It To There.
    8.) Leave The Title Empty.
    9.) Click Save, Now You Are Done.

    Style#1:


    <!-- This Is A CopyRight Search Engine.It Is Free To Use But With HTML Design Code.If AnyOne Found To Be Changing This Code Should Be Under Legal Action. -->
    <style type="text/css">
    #exe-searchbox{background:url(https://blogger.googleusercontent.com/img/b/R29vZ2xl/AVvXsEgF_NPAufTARWHA3E1AUaQNTKFhVuYKEzXyLiPUU3rv6SZOuLBrq_e7l8vGTcvg8-5koOxs9OWL07_oq2ZHy4yt9tWeINZ0tL3DfxgpsdHZ9iXRUYC5kTPkpgza5yhplFjXe6gcAZAMSA/s1600/Yellow-Search-Engine.png) no-repeat scroll center center transparent;width:310px;height:100px;disaply:block;}
    form#exe-searchform{display: block;padding-top:51px; padding-left:30px;;margin:0;}
    form#exe-searchform #s{padding-top:3px; padding-left:1px; width: 208px; font-size:14px; vertical-align:top; border:none; background:transparent;}
    form#exe-searchform #sbutton{padding-top:10px; padding-right:25px; height:15px; width:15x; border:none; background:transparent;}
    </style>
    <div id="exe-searchbox">
    <form id="exe-searchform" action="/search" method="get">
    <input type="text" id="s" name="q" value="Search Here..." onfocus='if (this.value == "Search Here...")
    {this.value = ""}' onblur='if (this.value == "") {this.value = "Search Here...";}'/>
    <input type="image" src="http://img1.blogblog.com/img/blank.gif" id="sbutton" />
    </form><div dir="ltr" style="text-align: left;" trbidi="on">
    <div style="text-align: center;">
    <a href="http://os-trickz.blogspot.com/2013/07/add-stylish-and-pretty-search-engine.html" target="_blank"><span style="color: #bf9000;"><span style="font-size: small;">Get This Widget</span></span></a></div>
    </div>

    Style#2:


    <style type="text/css">
    #exe-searchbox{background:url(https://blogger.googleusercontent.com/img/b/R29vZ2xl/AVvXsEiSDSCBqtDAC0XM2ovyvJNHL78RABvicLfj9pjxEZ4E0BLhcpTP4iMZDU7RPqfFzwhU5rGlhz7lzPiOZdnJuD_qRWb-TpK_tLneFnh9kDGXeHc0LyyNCeRW79pbKBtVyudArjIi_fEfpg/s1600/Black-Search-Engine.png) no-repeat scroll center center transparent;width:310px;height:100px;disaply:block;}
    form#exe-searchform{display: block;padding-top:51px; padding-left:30px;;margin:0;}
    form#exe-searchform #s{padding-top:3px; padding-left:1px; width: 208px; font-size:14px; vertical-align:top; border:none; background:transparent;}
    form#exe-searchform #sbutton{padding-top:10px; padding-right:25px; height:15px; width:15x; border:none; background:transparent;}
    </style>
    <div id="exe-searchbox">
    <form id="exe-searchform" action="/search" method="get">
    <input type="text" id="s" name="q" value="Search Here..." onfocus='if (this.value == "Search Here...")
    {this.value = ""}' onblur='if (this.value == "") {this.value = "Search Here...";}'/>
    <input type="image" src="http://img1.blogblog.com/img/blank.gif" id="sbutton" />
    </form><div dir="ltr" style="text-align: left;" trbidi="on">
    <div style="text-align: center;">
    <span style="font-size: small;"><a href="http://os-trickz.blogspot.com/2013/07/add-stylish-and-pretty-search-engine.html" target="_blank"><span style="color: black;">Get This Widget</span></a></span></div>
    </div>

    Style#3:


    <style type="text/css">
    #exe-searchbox{background:url(https://blogger.googleusercontent.com/img/b/R29vZ2xl/AVvXsEjqO-bOk4BARmVBOmGrGJysDory02HvaByyIh_UDflVRD9X1QcbKsMoxSjdK3MaJLxib7s4VSXiv_hKQyk-BwmYVJcE27p52k4H0GfvW1tC8o1C7x5KELRKbmo7ifkd72LS6d3V3AU6xA/s1600/Blue-Search-Engine.png) no-repeat scroll center center transparent;width:310px;height:100px;disaply:block;}
    form#exe-searchform{display: block;padding-top:51px; padding-left:30px;;margin:0;}
    form#exe-searchform #s{padding-top:3px; padding-left:1px; width: 208px; font-size:14px; vertical-align:top; border:none; background:transparent;}
    form#exe-searchform #sbutton{padding-top:10px; padding-right:25px; height:15px; width:15x; border:none; background:transparent;}
    </style>
    <div id="exe-searchbox">
    <form id="exe-searchform" action="/search" method="get">
    <input type="text" id="s" name="q" value="Search Here..." onfocus='if (this.value == "Search Here...")
    {this.value = ""}' onblur='if (this.value == "") {this.value = "Search Here...";}'/>
    <input type="image" src="http://img1.blogblog.com/img/blank.gif" id="sbutton" />
    </form><div dir="ltr" style="text-align: left;" trbidi="on">
    <div style="text-align: center;">
    <span style="color: #0b5394; font-size: small;"><a href="http://os-trickz.blogspot.com/2013/07/add-stylish-and-pretty-search-engine.html" target="_blank">Get This Widget</a></span></div>
    </div>

    Style#4:


    <style type="text/css">
    #exe-searchbox{background:url(https://blogger.googleusercontent.com/img/b/R29vZ2xl/AVvXsEjWLto80a5vBCVI6d47VCdhfcLoBi652JSS6z3FE9eCNeKLfYnz_Dtppx-mNhT6QHi1n1h0o6Xha-kS3uI94l1_bwO_eULexdjvACDe3_EOE_HYTMnIAb6efEvc7kuLvhDrJnLuUDQ2zA/s1600/Green-Search-Engine.png)
    no-repeat scroll center center transparent;width:310px;height:100px;disaply:block;}
    form#exe-searchform{display: block;padding-top:51px; padding-left:30px;;margin:0;}
    form#exe-searchform #s{padding-top:3px; padding-left:1px; width: 208px; font-size:14px; vertical-align:top; border:none; background:transparent;}
    form#exe-searchform #sbutton{padding-top:10px; padding-right:25px; height:15px; width:15x; border:none; background:transparent;}
    </style>
    <div id="exe-searchbox">
    <form id="exe-searchform" action="/search" method="get">
    <input type="text" id="s" name="q" value="Search Here..." onfocus='if (this.value == "Search Here...")
    {this.value = ""}' onblur='if (this.value == "") {this.value = "Search Here...";}'/>
    <input type="image" src="http://img1.blogblog.com/img/blank.gif" id="sbutton" />
    </form><div dir="ltr" style="text-align: left;" trbidi="on">
    <div style="text-align: center;">
    <span style="font-size: small;"><a href="http://os-trickz.blogspot.com/2013/07/add-stylish-and-pretty-search-engine.html" target="_blank"><span style="color: #6aa84f;">Get This Widget</span></a></span></div>
    </div>

    Style#5:


    <style type="text/css">
    #exe-searchbox{background:url(https://blogger.googleusercontent.com/img/b/R29vZ2xl/AVvXsEi8XGMe3tfNvniDXv8n7_0BPRDrxR91zm0ZZ7FBf8xhNqYKDCmn4f96lZIx4MYIIe4xeOuTauZhSzTWjyznG50S6K3IzfSjlAE__RL9_fy5XJEagWVZTjJpNXwtx9SCIlHPTafmj4o3KQ/s1600/Red-Search-Engine.png) no-repeat scroll center center transparent;width:310px;height:100px;disaply:block;}
    form#exe-searchform{display: block;padding-top:51px; padding-left:30px;;margin:0;}
    form#exe-searchform #s{padding-top:3px; padding-left:1px; width: 208px; font-size:14px; vertical-align:top; border:none; background:transparent;}
    form#exe-searchform #sbutton{padding-top:10px; padding-right:25px; height:15px; width:15x; border:none; background:transparent;}
    </style>
    <div id="exe-searchbox">
    <form id="exe-searchform" action="/search" method="get">
    <input type="text" id="s" name="q" value="Search Here..." onfocus='if (this.value == "Search Here...")
    {this.value = ""}' onblur='if (this.value == "") {this.value = "Search Here...";}'/>
    <input type="image" src="http://img1.blogblog.com/img/blank.gif" id="sbutton" />
    </form><div dir="ltr" style="text-align: left;" trbidi="on">
    <div style="text-align: center;">
    <span style="font-family: Arial,Helvetica,sans-serif;"><span style="font-size: small;"><a href="http://os-trickz.blogspot.com/2013/07/add-stylish-and-pretty-search-engine.html" target="_blank"><span style="color: #e06666;">Get This Widget</span></a></span></span></div>
    </div>
    Continue Reading >>

    How to Remove Showing Posts With Label in Blogger?

    For any default Blogger layout, the "Showing posts with label" message shows up above the posts whenever you click on a label link. As it's a pretty useless and annoying message, many people like to have it removed. If that is your wish, just follow the tutorial below:

    Removing "Showing post with label...show all posts": 

    Step 1. Go to Dashboard - Template - Edit HTML
    Step 2. Click somewhere inside the template code, then press -CTRL+F  key- to find this code:

        <b:includable id='status-message'>

    After you found it, click on the sideways arrow next to it, to expand the rest of the code (as shown below).

    Step 3. Below is this code that you need to remove - along with the first one, as well:

             <b:includable id='status-message'>
              <b:if cond='data:navMessage'>
              <div class='status-msg-wrap'>
                <div class='status-msg-body'>
                  <data:navMessage/>
                </div>
                <div class='status-msg-border'>
                  <div class='status-msg-bg'>
                    <div class='status-msg-hidden'><data:navMessage/></div>
                  </div>
                </div>
              </div>
              <div style='clear: both;'/>
              </b:if>
            </b:includable>
    screen shot:
     Step 4. Replace or Paste the following text instead of this one:

        <b:includable id='status-message'>
        <b:if cond='data:navMessage'>
        <div>
        </div>
        <div style='clear: both;'/>
        </b:if>
        </b:includable>


    Step 5. Save the template. Now view your blog and click on some label....there should be no box anymore.

    Continue Reading >>

    Add Rainbow Seven colors hover effect on Your Blog links

    Add rainbow color effects to your blog links very easily. If anyone hovers the mouse on any links then he/ she will see a cool seven types of color.As soon as when he hover out from that link then it will stop showing the different colors. This widget works based on simple JavaScript. Once it’s applied, all links on the page exhibit a rainbow effect on mouse over. Adding this widget to blogger is so easy just click add to blogger button below.
    • Go to Blogger Dashboard > Layout 
    • Click on Add a Gadget > HTML/Javascript.
    • Paste below code and save it.
    <script src="https://sites.google.com/site/prageethsoftsolution/Rainbow%20Color%20Effect.js" type="text/javascript"></script>
    Continue Reading >>

    Friday 26 July 2013

    Don, t Move files to recycle bin | Disable Delete Confirmation dialogue:

    I this tutorial I, will show you a very simple but helpful trick. I, ll show you how to configure recycle bin to "don, t move files to it" and also to "disable delete confirmation dialog". let, s see how to do this.

    Don, t move files to recycle bin:

    • For this just right-click on Recycle bin.

    • Then, navigate to properties.
    • Select your drive for which you want to configure.
    • Then, check on "Don, t move files to recycle bin". 


    •  Then, click on 'Apply'.

    Disable delete Confirmation dialogue:

    • Right-click on recycle bin.
    • Navigate to 'properties'
    • Just UN-check the "display delete confirmation dialogue" as shown in below figure.
    • Click on apply. 

    Keyboard Shortcut to do this:

    You can also use Shift button to do this. Holding Shift button during deleting prompt file not to be moved to Recycle bin.
    Continue Reading >>

    Thursday 25 July 2013

    How to Play all type of media files with Windows Media Player by installing Codec

    Windows media player has its own value and importance in Microsoft Windows (OS). If you will learn that "how to play all type of video and music files with Windows media player" then I can surely say that it will be your favorite and best media player.All type of other universal media player like VLC, KM player etc are only load for a PC. The only media player that runs smoothly is Windows media player Provided by Microsoft. I will teach you a way to play all type of media files with only a single Windows media player.
    Also Check: How to add "Open with Notepad" In the right click menu of the file?
    Process:  
    • The process of installation is so simple and easy.
    • You have to download a Codec pack named as K-Lite Codec Pack.
    •  Install this Pack.
    • After installing this Your Windows media Player will play all media files with all its features.
    • You can download this Codec Package by following link.
    Download Links:
    Download K-lite Codec pack.
    Continue Reading >>

    Wednesday 24 July 2013

    How to delete an undelete able or stubborn file by using unlocker?

    Today I will show you a way to delete an undelete able or a stubborn file by using unlocker. This is software created to kill processes running by file which prevent that file to be deleted. By using this you can freely delete a stubborn or undelete able file.
    Process to delete files with unlocker:
    • Just install the software.
    • If you have a file that is undelete able and you want to delete it just right-click it and choose unlocker.
    • Then click on kill processes.
    • Then, try to delete. This time the file will be deleted.

    Download links:
    Continue Reading >>

    Tuesday 23 July 2013

    How to use A Flash drive-USB or pen drive As A RAM in Windows XP,Vista And 7


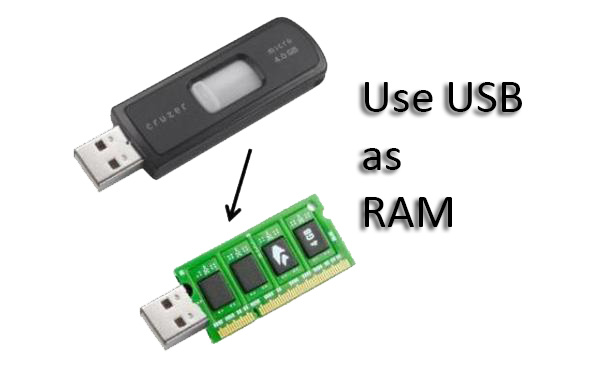
    In this post we tell you guys how to use a flash drive or pen drive as a RAM for WIN7, VISTA and XP. So let’s begin. Increasing the PC’s RAM using USB Flash Drive will help also enhance Game performance and decrease the time of execution of some tasks made by software.

    A) For WIN7/VISTA

    1. Insert your pen drive and then format it.

    2. Right click on your pen drive and then click on properties.

    3. Now navigate to Ready Boost tab, click on it and then Use this device. (Right click on the drive -> Properties -> Ready Boost-> Use this device)

    4. Choose maximum space or better choose around 80% of USB Drive’s size.

    5) Click on Ok tab and then restart your computer for the changes to take effect.

    NOTE:

    NEVER pull USB flash drive out of USB Port while it is being used as a Ready Boost device. Do NOT save any data files on the FLASH/USB drive when it is being used as Ready Boost device.

    Now you are all set to use your computer with increased RAM

    B) For Windows XP

    1) Firstly, insert your Flash Drive.

    2) Right Click on Computer > Properties

    3) Now click on advanced tab and then click on performance

    4) Now click on advanced and then click on the virtual memory tab.

    5) Then select your flash drive and click custom size

    6) Now view the memory available in your flash drive and enter the same in the Initial and the Max columns.

    7) Click on ok and then restart your computer for the effects to take place.

    That’s it. You have converted your USB flash drive into RAM. Now you can access your computer with increased RAM and higher speed
    Continue Reading >>

    How to Select Multiple Files In Microsoft Windows-You should know

    There are several ways to select multiple files or folders.
    1. Open the folder that contains the files or folders you want to select.
    2. Select the files or folders using any one of these methods:
      • To select a consecutive group of files or folders, click the first item, hold down the SHIFT key, and then click the last item.
      • To select a consecutive group of files or folders without using the keyboard, drag the mouse pointer to create a selection around the outside of all the items you want to include.
      • To select nonconsecutive files or folders, hold down CTRL, and then click each item you want to select.
      • To select all of the files or folders, on the toolbar, click Organize, and then click Select All.
    To cancel the selection of individual items within a selected group, hold down CTRL, and then click the items that you don't want to include.
    Continue Reading >>

    Keyboard Shorcut Keys- Google Chrome

    keyboard shortcuts For Google Chrome:

    Tab and window shortcuts

    Ctrl+N Opens a new window.
    Ctrl+T Opens a new tab.
    Ctrl+Shift+N Opens a new window in incognito mode.
    Press Ctrl+O, then select file. Opens a file from your computer in Google Chrome.
    Press Ctrl and click a link. Or click a link with your middle mouse button (or mousewheel). Opens the link in a new tab in the background .
    Press Ctrl+Shift and click a link. Or press Shift and click a link with your middle mouse button (or mousewheel). Opens the link in a new tab and switches to the newly opened tab.
    Press Shift and click a link. Opens the link in a new window.
    Ctrl+Shift+T Reopens the last tab you've closed. Google Chrome remembers the last 10 tabs you've closed.
    Drag a link to a tab. Opens the link in the tab.
    Drag a link to a blank area on the tab strip. Opens the link in a new tab.
    Drag a tab out of the tab strip. Opens the tab in a new window.
    Drag a tab out of the tab strip and into an existing window. Opens the tab in the existing window.
    Press Esc while dragging a tab. Returns the tab to its original position.
    Ctrl+1 through Ctrl+8 Switches to the tab at the specified position number on the tab strip.
    Ctrl+9 Switches to the last tab.
    Ctrl+Tab or Ctrl+PgDown Switches to the next tab.
    Ctrl+Shift+Tab or Ctrl+PgUp Switches to the previous tab.
    Alt+F4 or Ctrl + Shift + W Closes the current window.
    Ctrl+W or Ctrl+F4 Closes the current tab or pop-up.
    Click a tab with your middle mouse button (or mousewheel). Closes the tab you clicked.
    Right-click, or click and hold either the Back or Forward arrow in the browser toolbar. Displays your browsing history in the tab.
    Press Backspace, or Alt and the left arrow together. Goes to the previous page in your browsing history for the tab.
    Press Shift+Backspace, or Alt and the right arrow together. Goes to the next page in your browsing history for the tab.
    Press Ctrl and click either the Back arrow, Forward arrow, or Go button in the toolbar. Or click either button with your middle mouse button (or mousewheel). Opens the button destination in a new tab in the background.
    Double-click the blank area on the tab strip. Maximizes or minimizes the window.
    Alt+Home Opens your homepage in your current window.

    Google Chrome feature shortcuts

    Alt+F or Alt+E or F10 Opens the Chrome menu Chrome menu, which lets you customize and control settings in Google Chrome.
    Ctrl+Shift+B Toggles the bookmarks bar on and off.
    Ctrl+H Opens the History page.
    Ctrl+J Opens the Downloads page.
    Ctrl+Shift+Esc Opens the Task Manager.
    Shift+Alt+T Sets focus on the first tool in the browser toolbar. You can then use the following shortcuts to move around in the toolbar:
    • Press Tab, Shift+Tab, Home, End, right arrow, and left arrow to move focus to different items in the toolbar.
    • Press Space or Enter to activate toolbar buttons, including page actions and browser actions.
    • Press Shift+F10 to bring up any associated context menu (e.g. browsing history for the Back button).
    • Press Esc to return focus from the toolbar back to the page.
    F6 or Shift+F6 Switches focus to the next keyboard-accessible pane. Panes include:
    • Highlights the URL in the address bar
    • Bookmarks bar (if visible)
    • The main web content (including any infobars)
    • Downloads bar (if visible)
    Ctrl+Shift+J Opens Developer Tools.
    Ctrl+Shift+Delete Opens the Clear Browsing Data dialog.
    F1 Opens the Help Center in a new tab (our favorite).
    Ctrl+Shift+M Switch between multiple users.

    Address bar shortcuts

    Use the following shortcuts in the address bar:
    Type a search term, then press Enter. Performs a search using your default search engine.
    Type a search engine keyword, press Space, type a search term, and press Enter. Performs a search using the search engine associated with the keyword.
    Begin typing a search engine URL, press Tab when prompted, type a search term, and press Enter. Performs a search using the search engine associated with the URL.
    Ctrl+Enter Adds www. and .com to your input in the address bar and open the resulting URL.
    Type a URL, then press Alt+Enter. Opens the URL in a new tab.
    Ctrl+L or Alt+D Highlights the URL.
    Ctrl+K or Ctrl+E Places a '?' in the address bar. Type a search term after the question mark to perform a search using your default search engine.
    Press Ctrl and the left arrow together. Moves your cursor to the preceding key term in the address bar
    Press Ctrl and the right arrow together. Moves your cursor to the next key term in the address bar
    Ctrl+Backspace Deletes the key term that precedes your cursor in the address bar
    Select an entry in the address bar drop-down menu with your keyboard arrows, then press Shift+Delete. Deletes the entry from your browsing history, if possible.
    Click an entry in the address bar drop-down menu with your middle mouse button (or mousewheel). Opens the entry in a new tab in the background.
    Press Page Up or Page Down when the address bar drop-down menu is visible. Selects the first or last entry in the drop-down menu.

    Webpage shortcuts

    Ctrl+P Prints your current page.
    Ctrl+S Saves your current page.
    F5 or Ctrl+R Reloads your current page.
    Esc Stops the loading of your current page.
    Ctrl+F Opens the find bar.
    Ctrl+G or F3 Finds the next match for your input in the find bar.
    Ctrl+Shift+G, Shift+F3, or Shift+Enter Finds the previous match for your input in the find bar.
    Click the middle mouse button (or mousewheel). Activates auto-scrolling. As you move your mouse, the page automatically scrolls according to the direction of the mouse.
    Ctrl+F5 or Shift+F5 Reloads your current page, ignoring cached content.
    Press Alt and click a link. Downloads the target of the link.
    Ctrl+U Opens the source of your current page.
    Drag a link to bookmarks bar Saves the link as a bookmark.
    Ctrl+D Saves your current webpage as a bookmark.
    Ctrl+Shift+D Saves all open pages as bookmarks in a new folder.
    F11 Opens your page in full-screen mode. Press F11 again to exit full-screen.
    Ctrl and +, or press Ctrl and scroll your mousewheel up. Enlarges everything on the page.
    Ctrl and -, or press Ctrl and scroll your mousewheel down. Makes everything on the page smaller.
    Ctrl+0 Returns everything on the page to normal size.
    Space bar Scrolls down the web page.
    Home Goes to the top of the page.
    End Goes to the bottom of the page.
    Press Shift and scroll your mousewheel. Scrolls horizontally on the page.

    Text shortcuts

    Ctrl+C Copies highlighted content to the clipboard.
    Ctrl+V or Shift+Insert Pastes content from the clipboard.
    Ctrl+Shift+V Paste content from the clipboard without formatting.
    Ctrl+X or Shift+Delete Deletes the highlighted content and copies it to the clipboard
    Continue Reading >>

    How to Configure/make BSR screen recorder to Record In HD with Best Performance

    As, I told you that I shall give you a post from which you will learn to configure BSR screen recorder to record in HD. When I came to know this configuration that BSR can record HD video with best performance, it became my favorite and most reliable screen recorder. It runs smoothly on my pc with great performance. BSR is a well-known screen recorder due to its reliability and performance.

    Installing Compatible Video codec:
    There is fortunately a codec compatible with every operating system that will speed up the video performance of BSR. You can download this codec by clicking here. This codec is Xvid- codec, Install this codec for better compatibility and performance.

    Maximize the screen/video output Dimension:
    1.Go to options>video options and uncheck the Automatic present under video output dimension area.
    2.Set its value to 100% for making a 720p HD video or set its value to 125% or higher for making a 1080p HD video. I recommend that you set its value to 100%(As show in below fig.)


    Configure PC to reduce load:
    1.Right-click on computer and then navigate to properties.
    2.Click on Advance system settings
    3.Under performance area click on settings
    4.Check the “adjust for best performance”
    This will free up memory that is used by windows for visual styles and it will boost-up PC’s performance up to many times

    Please comment if you have some words about this article in your mind or if you have any type of problem.
    Enjoy.

    Continue Reading >>

    Adobe PhotoShop CS6 Portable Fully Activated Free Download Only 100mb

    This version of Photoshop is latest i-e CS6 and one cute and amazing thing about this is that this package is portable and its size is only 100mb.So, download it right now without any cost and no Activation  problem. This is fully activated forever.
    Also check: Zip-Rar-Ace Password Recovery Tool Full Version With serial key
    Download links: 
    Installation:
    Just extract files and run with great performance.Enjoy....
    Note:Don,t extract files to C drive or Windows drive in Windows 7 or vista.
    Continue Reading >>

    Monday 22 July 2013

    BSR HD Screen recorder Genuine With serial Key free download v5.2


    Hi guys, as you know that I always provide you most helpful and useful softwares. Now, I, m showing you best and full version of BSR screen recorder with genuine serial key. So, sit tightly for getting this genuine software. I, ll also show you how to configure, use and record screen in HD by using BSR. I recommend this screen recorder because this one is pc friendly. You can download this software from following link.
    Also check:how to configure/make BSR screen recorder to record in HD

    Download links:

    Serial key And Password:

    Name: Pr0c3ss
    Serial: 7726-3964-CP36-31DB-6DDD
    Rar Password: OS-Trickz.blogspot.com
    Continue Reading >>

    How to un-register IDM


    IDM un-registration: 

    Hello my lovely viewers. Today, I will show you how to un-register IDM. We know that some people have slow computers and they require re-installation of windows to refresh their PCs. Re-installation of windows boost-up performance of computer especially for windows XP users. IDM provides 30 days trial to download media. So, for these types of PC users, they don, t need to register IDM. But sometimes the people may register IDM and face IDM fake serial problem and don, t know to un-register it to continue its trial period. So, it decided to help you by giving a registry file to un-register IDM. You can download this file from following link. 

    Download links:Un-registerIDM.reg

    Continue Reading >>

    Saturday 20 July 2013

    How to Disable Mouse Selection On Your Blog?

    I found this amazing trick then i decided to share this trick with my friends by posting it on my blog.
    It will disable Mouse selection on your blog.For Protecting your blog from copyright the easiest way is to disable mouse selection on your blog by which no one can copy text and images, we can make it possible by using small JavaScript code which will disable mouse selection on blog.

    Java script Code For disabling mouse selection:

    <script type="text/javascript">
    var omitformtags=["input", "textarea", "select"]
    omitformtags=omitformtags.join("|")
    function disableselect(e){
    if (omitformtags.indexOf(e.target.tagName.toLowerCase())==-1)
    return false }
    function reEnable(){
    return true }
    if (typeof document.onselectstart!="undefined")
    document.onselectstart=new Function ("return false")
    else {
    document.onmousedown=disableselect
    document.onmouseup=reEnable }
    </script>

    For blogger

    1.Go to blogger dashboard
    2.Click on Template tab.
    3.Now Add Gadget >> HTML/JavaScript
    4.Paste JavaScript code there which I provided above.
    5.After pasting code click on Save button and say bye to content thief.

    For WordPress

    1. Go to Wordpress dashboard
    2. Now click on Appearance >> Widgets >> Add New Text Widget
    3.Paste JavaScript code there which I provided above
    4.After pasting code click on Save button and say bye to content thief.
    Continue Reading >>

    How to Download Adobe Products Directly or With IDM(internet download manager)

    Hi all,
    Have you ever noticed that we cannot download adobe products directly?Now, A download manager is required to download them.Its speed is too slow than Internet download manager.I will show you how to download adobe product directly (no client and manager needed)? let,s see:
    Also check:Adobe PhotoShop CS6 Portable Fully Activated Free Download Only 100mb 

    Procedure:

    1.Go to website named Pro-design tools .
    2.Go to Download session.
    3.Then, It will provide you a list of adobe products that you can download directly.
    4.That,s it .Now, you can download adobe products directly Having no problem.
    Enjoy and don,t forget to say thanks.

    Other Similar Articles That may interest you:

    Register IDM any version for Lifetime in windows 7, XP, Vista and 8
    How to activate windows 8 and make it fully genuine
    Windows XP genuine Serial Keys
    How to convert IDM resume Capability From "No" To "Yes" ?
    Zip-Rar-Ace Password Recovery Tool Full Version With serial key
    Add Auto Read More With thumbnails for blogger posts fully working for almost all Templates In blogger
    Continue Reading >>

    Wednesday 17 July 2013

    How to Remove attribution "Powered by blogger" From Your blog?

    Os-trickz.blogspot.com
    If you want to remove attribution then follow these simple steps:
    1) Go to blogger.
    2) Choose your blog
    3) Then, go to Template>Customize>Advance>Add CSS .
    4) Paste the following code.
    #Attribution1 {display: none;}
    Note: You can also go to template>edit template and then add the above code before ]]></b:skin>
    5) Then click on "Apply to Blog"
    Now, The attribution has been removed
    Continue Reading >>

    Keyboard Shotrcut Keys For Windows 8 Full working Hotkeys


    Hi Windows Lover! Today As Title we are sharing complete list of windows 8 keyboard shortcut keys to make your life easier. Some Commands also work with windows 7 .
    Windows key: Switch between Modern Desktop Start screen and the last accessed application 
    Windows key + C: Access the charms bar 
    Windows key + Tab: Access the Modern Desktop Taskbar 
    Windows key + I: Access the Settings charm 
    Windows key + H: Access the Share charm 
    Windows key + K: Access the Devices charm 
    Windows key + Q: Access the Apps Search screen 
    Windows key + F: Access the Files Search screen 
    Windows key + W: Access the Settings Search screen 
    Windows key + P: Access the Second Screen bar 
    Windows key + Z: Brings up the App Bar when you have a Modern Desktop App running 
    Windows key + X: Access the Windows Tools Menu 
    Windows key + O: Lock screen orientation 
    Windows key + . : Move the screen split to the right 
    Windows key + Shift + . : Move the screen split to the left 
    Windows key + V: View all active Toasts/Notifications 
    Windows key + Shift + V: View all active Toasts/Notifications in reverse order 
    Windows key + PrtScn: Takes a screenshot of the screen and automatically saves it in the Pictures folder as Screenshot 
    Windows key + Enter: Launch Narrator         
    Windows key + E: Open Computer 
    Windows key + R: Open the Run dialog box 
    Windows key + U: Open Ease of Access Center 
    Windows key + Ctrl + F: Open Find Computers dialog box 
    Windows key + Pause/Break: Open the System page 
    Windows key + 1..10: Launch a program pinned on the Taskbar in the position indicated by the number 
    Windows key + Shift + 1..10: Launch a new instance of a program pinned on the Taskbar in the position indicated by the number 
    Windows key + Ctrl + 1..10: Access the last active instance of a program pinned on the Taskbar in the position indicated by the number 
    Windows key + Alt + 1..10: Access the Jump List of a program pinned on the Taskbar in the position indicated by the number 
    Windows key + B: Select the first item in the Notification Area and then use the arrow keys to cycle through the items Press Enter to open the selected item 
    Windows key + Ctrl + B: Access the program that is displaying a message in the Notification Area 
    Windows key + T: Cycle through the items on the Taskbar 
    Windows key + M: Minimize all windows 
    Windows key + Shift + M: Restore all minimized windows 
    Windows key + D: Show/Hide Desktop (minimize/restore all windows) 
    Windows key + L: Lock computer 
    Windows key + Up Arrow: Maximize current window 
    Windows key + Down Arrow: Minimize/restore current window 
    Windows key + Home: Minimize all but the current window 
    Windows key + Left Arrow: Tile window on the left side of the screen 
    Windows key + Right Arrow: Tile window on the right side of the screen 
    Windows key + Shift + Up Arrow: Extend current window from the top to the bottom of the screen 
    Windows key + Shift + Left/Right Arrow: Move the current window from one monitor to the next 
    Windows key + F1: Launch Windows Help and Support

    PageUp: Scroll forward on the Modern Desktop Start screen 
    PageDown: Scroll backward on the Modern Desktop Start screen 
    Esc: Close  a charm 
    Ctrl + Esc: Switch between Modern Desktop Start screen and the last accessed application 
    Ctrl + Mouse scroll wheel: Activate the Semantic Zoom on the Modern Desktop screen

    Alt: Display a hidden Menu Bar 
    Alt + D: Select the Address Bar 
    Alt + P: Display the Preview Pane in Windows Explorer 
    Alt + Tab: Cycle forward through open windows 
    Alt + Shift + Tab: Cycle backward through open windows 
    Alt + F: Close the current window Open the Shut Down Windows dialog box from the Desktop 
    Alt + Spacebar: Access the Shortcut menu for current window 
    Alt + Esc: Cycle between open programs in the order that they were opened 
    Alt + Enter: Open the Properties dialog box of the selected item 
    Alt + PrtScn: Take a screen shot of the active Window and place it in the clipboard 
    Alt + Up Arrow: Move up one folder level in Windows Explorer (Like the Up Arrow in XP) 
    Alt + Left Arrow: Display the previous folder 
    Alt + Right Arrow: Display the next folder 
    Shift + Insert: CD/DVD Load CD/DVD without triggering Autoplay or Autorun 
    Shift + Delete: Permanently delete the item (rather than sending it to the Recycle Bin) 
    Shift + F6: Cycle backward through elements in a window or dialog box 
    Shift + F10: Access the context menu for the selected item 
    Shift + Tab: Cycle backward through elements in a window or dialog box 
    Shift + Click: Select a consecutive group of items 
    Shift + Click on a Taskbar button: Launch a new instance of a program 
    Shift + Right-click on a Taskbar button: Access the context menu for the selected item 
    Ctrl + A: Select all items 
    Ctrl + C: Copy the selected item 
    Ctrl + X: Cut the selected item 
    Ctrl + V: Paste the selected item 
    Ctrl + D: Delete selected item 
    Ctrl + Z: Undo an action 
    Ctrl + Y: Redo an action 
    Ctrl + N: Open a new window in Windows Explorer 
    Ctrl + W: Close current window in Windows Explorer 
    Ctrl + E: Select the Search box in the upper right corner of a window 
    Ctrl + Shift + N: Create new folder 
    Ctrl + Shift + Esc: Open the Windows Task Manager 
    Ctrl + Alt + Tab: Use arrow keys to cycle through open windows 
    Ctrl + Alt + Delete: Access the Windows Security screen  
    Ctrl + Click: Select multiple individual items 
    Ctrl + Click and drag an item: Copies that item in the same folder 
    Ctrl + Shift + Click and drag an item: Creates a shortcut for that item in the same folder 
    Ctrl + Tab:  Move forward through tabs 
    Ctrl + Shift + Tab: Move backward through tabs 
    Ctrl + Shift + Click on a Taskbar button: Launch a new instance of a program as an Administrator 
    Ctrl + Click on a grouped Taskbar button: Cycle through the instances of a program in the group 
    F1: Display Help 
    F2: Rename a file 
    F3: Open Search 
    F4: Display the Address Bar list 
    F5: Refresh display 
    F6: Cycle forward through elements in a window or dialog box 
    F7: Display command history in a Command Prompt 
    F10: Display hidden Menu Bar 
    F11: Toggle full screen display 
    Tab: Cycle forward through elements in a window or dialog box 
    PrtScn: Take a screen shot of the entire screen and place it in the clipboard 
    Home: Move to the top of the active window 
    End: Move to the bottom of the active window 
    Delete: Delete the selected item 
    Backspace: Display the previous folder in Windows Explorer  Move up one folder level in Open or Save dialog box 
    Esc: Close a dialog box 
    Num Lock Enabled + Plus (+): Display the contents of the selected folder  
    Num Lock Enabled + Minus (-): Collapse the selected folder 
    Num Lock Enabled + Asterisk (*): Expand all subfolders under the selected folder    
    Press Shift 5 times Turn StickyKeys on or off 
    Hold down right Shift for 8 seconds Turn FilterKeys on or off 
    Hold down Num Lock for 5 seconds Turn ToggleKeys on or off
    If any command not working or we forget to any shortcut key kindly update us via comments
    Continue Reading >>

    Search This Blog